This post will be structured more akin to a tutorial on how to take photos of star trails which was the task I set my self to this past week. For the past few months I’ve desired to photograph star trails and well the stars aligned and gave me the opportunity to photograph them. I will try to be a bit more abstract with this to make it applicable to any camera and even doable on a smart phone. And, what do they say, the best way to master something is to teach it, so that is why this is a tutorial!
Preparation
Before attempting to shoot star trails, a location must be picked. In my limited experience, there are four things that need to be balanced: foreground, star placement, accessibility and light pollution. Foreground: Trees, rocks, lakes, anything! Just search for images of star trails and a world of inspiration is available, many of which can be used in your photos. Star placement: The stars move in different directions depending on where they are in the sky. In the northern hemisphere, pointing north will have the north star circled by the others as the earth rotates. The best way to see how the stars will look is to do an Internet search for images and from there, you can decide your composition. Accessibility: Fairly self-explanatory but you probably do not want to be doing a 10 mile hike in the dark –unless you do, then have at it! Light pollution: A darker sky will result in more stars, however, in practice even fewer visible stars will still look pretty so don’t let that stop you from taking photos!
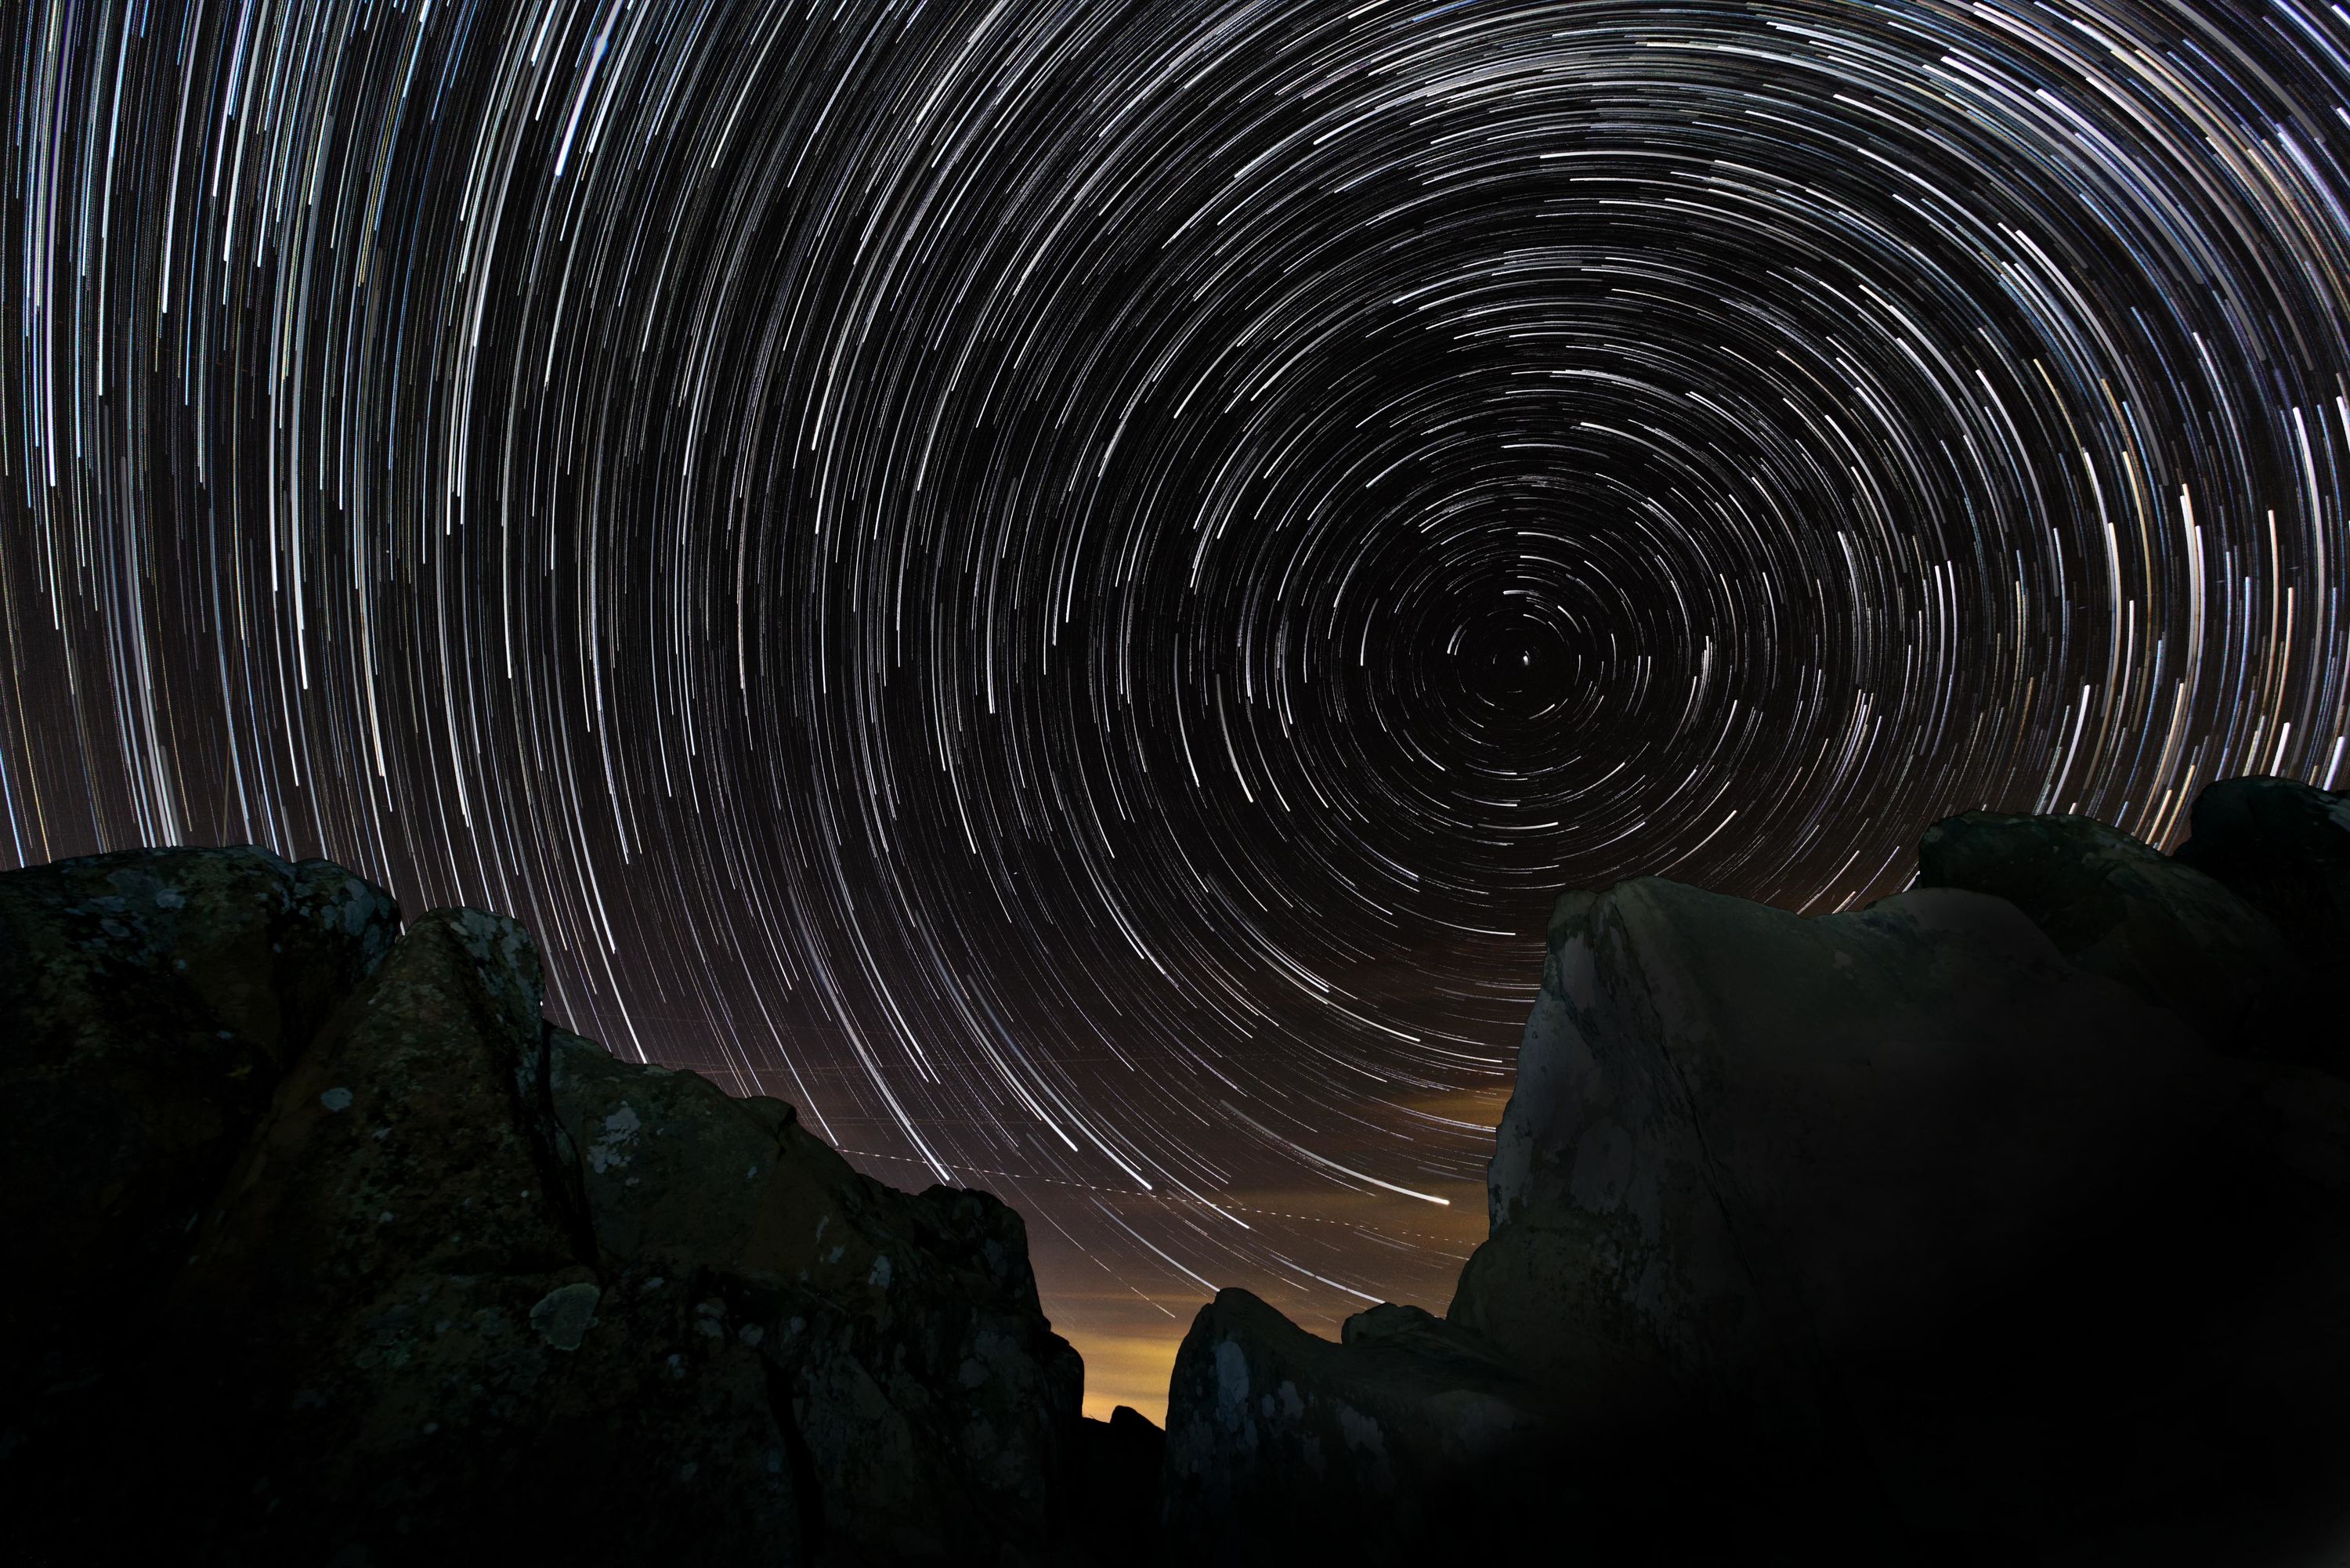
Have the spot picked out well before sundown or perferably decide some days in advance. My attempt at star trails was shot at Stony Man. I picked it the week prior while I was staying in Shenandoah with my family because of its rocky foreground, view of the northern sky, accessibility, and not having too much light pollution.
Another decision should be made beforehand is how long to photograph. Star trails do not have to be long photo shoots for them to be brilliant. Like most of these artistic choices the best way to see what is best in your opinion is to search for images so you can decide what style fits your artistic vision for the shoot.
If at some point you do want to photograph star trails, I recommended doing some test shots from your backyard. These shots will make it easy to spot any mistakes that need to be fixed. My test shots certainly helped me as I had gaps between the stars when I first did it.
Some other factors that are important but less controllable is weather and the moon. Ideally the sky should be perfectly clear but some small thin clouds will not ruin the shot, mine had some. In most cases, at least starting out, you will not want the moon in your photo. This can be avoided by shooting during an new moon, while the moon is bellow the horizon or facing the opposite direction. There are many astronomy apps that can help determine the moons placement which are also useful in finding the the small dipper and the north star which if photographing the northern sky is important in composition.
Equipment needed:
- Camera with manual controls
- Intervalometer*
- Tripod
- a spot without a ton of light pollution
*an intervalometer is a device to take a photo every x seconds, most cameras have these built in. If not they can be found for around $30.
The requirements for photographing star trails are quite simple for the results they can yield. With some patience even a smartphone with a manual control app can be used. There is no need for a fast lens, any focal length will work; and there is, no need for some top of the line camera with ideal low light performance.
Setup
There are two methods to shoot star trails, one long exposure or multiple exposures. I will focus on multiple exposures as it yields results with less noise and more importantly, they are less risky. In a single exposure bumping the tripod or a stray headlight could ruin the whole photo, whereas, when multiple photos are used ones with mistakes can just be thrown out.
After setting up the tripod and camera to face the desired composition the first step is to get the focus. Auto focus generally does not work well in low light and when the auto focus changes across shots, it will ruin the photos so manual focus should be used. If your lens has focus markings, whether on screen or on the lens, those can be used. However, if your camera does not have that feature, this guide does a good job of explaining the different methods of ensuring the stars stay sharp. Unlike Milky Way photography, star trails are much less picky about perfect focus so don’t worry about perfection. One tip when focusing, set the camera to the highest possible ISO and widest aperture to allow a fast shutter to make shooting test shots a lot easier. This will yield a poor, noisy image but you can use it to see if the stars are in focus.
Here’s some quick camera settings that need to be changed anytime in advance of the shoot. Doing it in advance is much easier than trying to search the Internet for where these camera settings are like I was doing. First, if you are not already shooting in raw set your camera to shoot in “raw + jpeg”. This setting uses more space and may not be necessary but if some editing is required, having the raw data is very useful. Second, disable long exposure noise reduction. This causes a delay in processing the photos with long shutter speeds and if used with star trails it will cause gaps to appear between the stars because of the added delay when stacked.
For getting the proper exposure, set the camera to manual. For multiple exposures, set the shutter speed to about 30s. For most lenses, the aperture should be set at its widest to let in the most light. Depending on the lens, narrowing the aperture might be worthwhile to increase the sharpness. If in doubt, just leave the lens wide open, it will be sharp enough. The ISO can then be determined by a little trial and error, start at about 1000 then look at the photo taken and see if the stars are properly exposed. A higher ISO makes the camera sensor more sensitive to light with the disadvantage that generally a higher ISO will result in more noise.
For my photo I had a shutter speed of 25s, an aperture of f4, and an ISO of 1250. I used a shorter shutter speed of 25s compared to 30s as I calculated with 25s the stars would still appear spot-like allowing me to make a timelapse of the stars moving across the sky with the same frames. This is unnecessary and will not effect the final star trails. f4 is the widest aperture of lens and then I increased my ISO up 1250 to attain a proper exposure.
Ideally all of these settings should be determined in advanced, this can be done just by experimenting with the stars in your backyard.
Photographing
The same exact frames used in for the star trails but made into a timelapse
After setting all the camera settings take one shot and ensure that composition is what you want and the stars are in focus and illuminated. If this frame has a mistake it will be in every frame so ensure it looks like a good properly exposed and composed picture of the night sky.
Now that the camera is ready to shoot, the intervalometer is used to tell the camera to repeatedly take the photos. The exact steps will vary by camera model and intervalometer so these steps are broad. Set it to take a photo 1 second after the last photo is taken. Leave the cap at infinity, this means it will just keep on taking photos tell you stop it and ensure there is no start delay. If you are using a separate intervalometer, some require the camera to have the shutter speed set to bulb on the camera, if this is the case the shutter speed is then entered into the intervalometer.
Once set, click start and your good! With the intervalometer set, the camera will automatically photograph until you’re ready to turn it off. So sit back, set a timer on your phone for the duration you want to photograph and relax.
Optional: When you are done photographing, you might want to take a few dark frames which can help reduce image noise. This is done by putting the lens cap on the camera then shooting with the same settings. This is the same processes the camera does with long exposure noise reduction except done manually and only once. This is not needed though, I forgot to take these frames and the result was fine.
Post Processing
At this point, you have a few hundred frames which may look pretty but they aren’t star trails yet. All of the final magic is in the post processing. Stacking the final stars is a fairly simple process made easy by the many programs that are dedicated for this purpose though plain old Photoshop can be used if you have it or a similar program. For Photoshop and the many free alternates like Krita or Gimp, add each image as layer then change the blend mode from normal to lighten for all the layers. For a dedicated program, I recommend StarStaX, its fairly powerful and gives you more options related to how you want to style the stacked images. To achieve a simple star trail, add the images. This is done by clicking “add files” in the left column then selecting the photos. At this point, if you click process icon at the top you will receive star trails.
This is more of a primer then a full tutorial, there is much more to learn in regards to star trails and much that I don’t know. I’m writing this tutorial sounding knowledgeable but in reality, I am just getting started and there is so much more for me to learn! I hope this tutorial makes you realize that YOU can make star trails and these photos are not some lofty unachievable task but something you can do whether you have been taking photos for many years or only a few days. While I worry I used too much lingo and this is not an assessable article to those outside of the photography hobby, hopefully it will be of inspire someone to try it themselves. It has been useful for me to write out my process so hopefully, it might be useful to you too. Have a good day!
Guides I found useful:
- General guide, contains a lot of helpful tips and examples
- Another very helpful general guide, also contains more instructions on how to use StarStaX
- Besides some general information contains how to in Photoshop if thats your cup of tea
- Not touched in this article but if individual frames needs adjustments such as exposure changes editing them in bulk can be done in rawtherapee